Thursday, August 29, 2013

Living from Scratch 03 - Microwave Oatmeal

I know it's been a while since my last post, and without any warning or anything, so I apologize! 

For those of you that don't know, I run this blog solely from my 3G on my iphone4... Which isn't horrible or anything  but is also not the easiest set up. 

The Living from Scratch series is a little out of order now but at least I'm getting stuff posted. 

So here's a post about oatmeal. 

Microwave oatmeal is great, it's fast and fun and (older) kids can even make it themselves. But again it's one of those things that you're not always sure of the ingredients, and it's not always very cost effective. There's also a limited number if flavors. 

Anyone who knows me knows how much I love the app Snapguide. You can access it through your computer but its a slightly different setup, however you can still access all the great guides. 
A while back I found this awesome guide on *making* microwave oatmeal by Lucy Hundall (link will be posted at the bottom of the post). 

I took her basic recipe and expanded it a little. I've also thought of a million ways to add too it, but this time didn't have a lot if what I'd like to have shown you. 

**************************************************
::::Here's the basic recipe::::
1/3c oats (I use 1minute quick oats)
1tsp brown sugar
1/4tsp cinnamon

Add all ingredients to a Baggie, label and store.
When ready to eat, follow these directions. 
-pour contents into bowl
-add 2/3c water or milk
-microwave 1minute
-stir
-microwave one minute more
-enjoy
**************************************************


You'll also need some ziplocking baggies, a storage container and your measuring utensils. 


Here I've added a few more flavorings and dried fruit. The combinations are endless. 

Some great addins are flax or chia seeds, protein powder, coconut flake, chocolate chips etc. 
For a fruit and cream flavor, use white sugar, dry milk powder and dried fruit. 


Set up your bags by folding over the ziplocking part and flattening the bottom. If you'd like you can also stand them up in cups. I started with 10 but eventually made 14. 

 
Oats into the bag.


Add your other ingredients, I made a variety of flavors: blueberry, cinnamon rains, chocolate, pumpkin pie and cinnamon and brown sugar, I added a mixed fruit combo later also. 


Roll them up and label them.


Store in an appropriate container. 


Label with the instructions. Abs that's it. It actually took me longer to write this blog than it did to make the oatmeal packs. 

A few ways to make it a bit healthier:
-Leave out the sugar and add honey or agave after microwaving. 
-Use yogurt instead of milk or water. 
-Use alternative milks, like almond milk. 
-add nuts or seeds. 


Well I hope you liked this easy recipe for cutting costs and eating healthier. I always have these things in my house anyway, all I did was add then to a bag, which I also always have, so this did not cost me anything more that what I was already spending during my regular grocery shopping. 

The fruit I used in this I dried myself also, so yay for homemade!

Leave a comment with your ideas or questions and thanks for reading! 


**the original idea for this came from Lucy Hundall, through snapguide. http://snapguide.com/guides/make-homemade-microwave-oatmeal**


Sunday, July 21, 2013

Living from Scratch 02


Yay! The first part in my Living from Scratch Series! Almond Milk. 


*The pictures from this day are horrible... and crazy, I really need a camera person lol. Alas lets start with where I started:

The Almond Milk:
I started with this because it needs to sit over night or for at least 12 hrs. I have been drinking almond milk for a long time and I love it, but then I got to looking at the ingredients... I have no idea what some of that stuff is. All it takes to make almond milk is almonds and water. You can add sweetener, or in my case a touch of salt, but it's not necessary. I will say though, that you should blend your almond milk with an immersion blender if you can. It separates pretty seriously as it sits. This isn't really a problem, it just needs to be shaken, but blending a second time helps.


I used:
1c Raw Almonds
8c Water (total)
1/2tsp Kosher Salt (I suggest 1/4tsp in the future)


Add the Almonds and 2 cups of water, with the salt, to a container that can sit over night or for at least 12 hrs. Cover and leave it alone.


It looks gross, but this is what's called *Milking*. It's what you want... when this happens, swirl it around.


That's a little better right? So let it sit and keep swirling until its a thickness you like. I actually didn't let mine sit quite long enough, but it's just a lesson for next time.


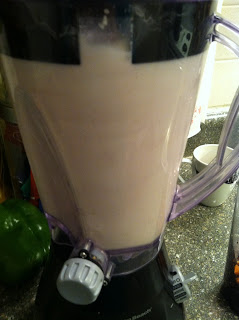
Put the soaked almonds and water in the blender, with the rest of the water, I did mine in two equal parts to accommodate my blender. Blend until its a thick, creamy consistency.


I retrospect, I would not use cheesecloth again, or at least not this one, And maybe I just used it incorrectly, but It didn't work out so great for me. Whatever kind of straining you use, set it up so you can pour in your almond milk.


It'll be frothy, just keep pushing the pulp to the side. DO NOT THROW AWAY THE PULP!


Wrap it up and squeeze. Get as much liquid out as you can. When you're through, this is when I recommend, restraining and re-blending, for the smoothest outcome.


Yummy! Okay so now what to do with the almond pulp?
Make almond flour! This doesn't produce much almond flour, maybe about 1c - 1 1/2c. But if you get into the habit of making your own almond milk once a week (that's about how long it'll last) you'll have a nice amount of flour in no time, and it'll last for a pretty good while.
To Make the almond flour, simply spread the almond pulp onto a lined cookie sheet and put in a 200f oven for around 6 hours, mixing up every hour or so. I did this at the same time I dehydrated my fruit, so I will post the pictures for that in the next post with the fruit.

Important Note: I did not make the almond milk first and then move on to the next thing, I started the almond milk and did other things in between the steps. That's how I did everything.

Living from Scratch 01


Microwave popcorn, chips, candy bars... these are all snacks that we know have lots of processed elements in them. But what about the everyday foods that we take for granted as being if not healthy, at least better for you than say... a Big Mac?

There are just some staples that we purchase without even thinking. For me, some of the big ones are sour cream and chicken broth. I am a firm believer in purchasing store brand. I have shopped at Kroger as long as I've lived near one, and 9 out of 10 of their products are just as good, if not better, than their name brand counterparts. Often times, store brands are even better for you, having less additives and chemicals. But processed foods are just that, processed.

I don't know about you but I just don't have the time for lengthy preparations, or the room to stock pile. I do however have the time to make some easy and simple staples that will cut out a lot of the unwanted additives and only takes a few hands on moments to prepare.

The next few weeks will be filled with guides, tips and detailed pictures of how to a live a little cleaner without breaking the bank or spending hours on something that will yield little output (I hope!).
I'm excited to start this journey with you and find out what really works for me and my family. Don't expect to come and find all the answers, because I expect that it will actually be more akin to the bloopers reel from a comedy...
So off we go!

The first thing I did was compile a list of things I wanted to try making from scratch, then I found common elements in some of those things, and I picked the ones I thought I could do with the most efficiency.
This wasn't a total bust... although I wound up biting off more than I could chew, no pun intended, and didn't get everything done. But that was okay because it helped me realize what is a realistic expectation for a day off. I really wanted to try to fit in a whole day and see what my limitations were.
Here's what I attempted:

  • Make chicken broth
  • Home made chicken filled pizza rolls
  • Make home made chicken nuggets
  • Make chicken pot pie
  • Make 2-4 kinds of Larabars
  • Make REAL yogurt dipped pretzels
  • Make almond milk
  • Make almond flour
  • Make dehydrated fruit

Here's what I actually got done:

  • Made chicken broth
  • Made pizza rolls
  • Made chicken pot pie
  • Made 2 kinds of Larabars
  • Made almond milk
  • Made almond flour
  • Made dehydrated fruit

I also made the filling for the chicken nuggets  but then I cut my finger with the stick blender and everything else went out the window. I would never have gotten the pretzels done though... even if I hadn't cut my finger. So I think I did pretty well considering, but to be honest by about 4pm I was so tired I just wanted to go to sleep, and it kind of ruined the rest of my day. My little girl was also a little upset because she got bored with helping and wanted me to come play with her but I was in the middle of so many things that I didn't feel safe walking away from. Now to be fair, she did sit right outside the kitchen door and chat with me the whole time. Which was great because she felt paid attention too but I was still free to move around the kitchen without worrying about her.

I started with the Almond Milk the night before. That will start the series in the next post.
I look forward to seeing your comments and input in the comments! And good luck with all your happy home making endeavours!

Saturday, July 6, 2013

A whole new Pierogi

Unfortunately I don't have pictures for this. I wasn't planning to write a blog about it but this morning I woke up with the realization that its the perfect recipe for this blog. #newbloggerproblems

Here are the ingredients:
2tbsp butter
3tbsp (roughly) flour
1can low sodium chicken broth
1can evaporated milk
1can creamed corn
1box Reg. size Pierogis
1lb ground meat (optional)
Seasonings such as black or red pepper, salt, basil, etc. 

You can also add in veggies, different meats, such as sausage or bacon, cheese. This was just a base but it came out nicely. Next time I make any part if this recipe I'll take a picture and go back and add it in. 

First thing I did was create a rue. I melted about 2tbsp of butter in a large deep skillet and slowly added the flour until I got a pasty kind if consistency. How much flour you use will decide how thick your final sauce is. I'm guessing I used the above mentioned amounts if butter and flour but its a guess. Start with that and see how it turns out. 

Anyhow, start adding, a few table spoons at a time, the chicken broth. Turn the heat to med-hi and stir or whisk well in between each addition. This will ensure you don't have any lumps. Once all the broth is added, slowly, while whisking, add the evaporated milk. You could use half and half also, or even milk or heavy cream. The consistency will change depending in what you use, but hey... This *is* ''cooking with whatcha got'... Not 'cooking with stuff you have to leave the house and spend more money on'.

When that's fully mixed in, add your can if creamed corn. Stir and taste. Add whatever seasonings you'd like. I kept it simple and only added black pepper. But it's like a blank canvass. It'll go we'll with thyme, basil, lemongrass, curry would even be good. Use what you have! 

Add in the Pierogis. I use frozen, Mrs. Ts cheddar and potato in this case. Cover and cook on medium until Pierogis are cooked through and sauce has thickened. About 15 minutes. Stir occasionally so sauce doesn't stick. 

If you're adding meat, brown it separately while Pierogis are cooking. Drain and add in during the last five minutes or so of cooking. 

Serve hot as is or sprinkled with cheese or herbs. 

According to the recipe I put into myfitnesspal, this serves four, and comes out to be 408 calories each, without meat. 
If you have myfitnesspal and would like to search this recipe, it is titled 'pierogis in cream sauce'. 

Tuesday, July 2, 2013

It's soda.... Right?

You can find a very condensed simplified version of this blog/guide/recipe/idea thing at: http://snp.gd/tbdvkk


I don't drink much soda, and neither does Kiddo. In fact, she drinks soda maybe once every six months. 
But Boyfriend drinks it and so Kiddo is becoming more curious about what's so good about soda. 
Between that, and Boyfriend trying to cut  caffeine out of his diet, I thought it was time to come up with a solution. 

Enter the seltzer water and the ice cube trays!

Okay so you've probably figured it out already right? Good, but before you start here are some note worthy tips, after a bit of research. 

Lets start with tonic water: 
You could use this, but then you could just drink soda... The idea is to cut out as much junk as possible. I bypassed tonic water because it had too much sugar and sodium in it and was more than just water. 

Well what about diet tonic water?
They took out the sugar but added more sodium... No Ty, moving on. 

But please, if YOU choose to use tonic water, then by all means, do it and do it proudly. I'm not here to judge you, just my own taste buds and ideas. But this is why I skipped it none the less. 
A
Okay club soda! Go!
Sorry for the blurry picture! Egads! This is worse than the diet tonic water. This is literally carbonated salt water.  

You can't really tell... Because of my epic picture taking talents... But the Canada Dry has 80mg of sodium where as the Kroger brand has 65mg. 
Make sure that you're buying for quality not label name. 

Okay... Seltzer... You're on!

I think I was subconsciously biased... Cause that's a good photo lol. Anyhow THIS is what I was searching for. It is, very simply, carbonated water. 

In this case, the store brand was the same as the more expensive one, do something good for your wallet... Buy the store brand lol. 

Okay, so what have we learned today? That not all carbonated water beverages are creat equally? Yes! And also make sure to read the labels if you're not really sure. Especially if its something you don't usually purchase. 

So with step one (finding the right carbonated water beverage) out if the way, we now turn to juice. Yes juice... Real juice. 

What kind of juice us totally up to you. Apple juice has a lot if sugar, so you probably want to steer clear of that. 

Bolthouse juices are delicious and packed with vitamins and nutrients. They also go on sale at my Kroger pretty often. When they do I buy about 30 of them. I use them for everything from drinking strait to cooking/baking to smoothies. This is also one if the least expensive ways to buy pomegranate juice (when they are buy one get one free). 

I will point out though, that because these are real juice, they don't freeze completely, and they melt/defrost very quickly. I still like them for the flavor and even the texture. 

You could also juice your own fruits and veggies and use that, or mash up watermelon into a purée and add that. 

The possibilities are practically endless!  

I love these little Halloween ice cube trays, I got them (from Kroger of course) for just a dollar each around the beginning of October last year. I have used them for tons of things, including juice cubes and homemade caramels. 

Anyway, the next few steps are pretty strait forward. Pour juice if choice into an ice cube tray. Freeze overnight. 


Add as many cubes as you want to your cup. Kiddo was very excited to help with this part. It was a good time to talk about good foods, and also about the senses. 

Are the juice cubes hot or cold? How can you tell? Can you smell them? What do they look like? Etc...


Pour the Seltzer water over the juice cubes....

We talked about science. What did she think would happen when we poured the seltzer over the ice, would it change color and why, would the same effects happen if the water was not carbonated? Etc.


Enjoy! I feel good giving this to her as a sometimes treat. Carbonation still isn't great for teeth, but she has good brushing habits, so I feel it balances out. 

So far this is working pretty well. We don't have it constantly, but it wouldn't be difficult or expensive if we did. 

Tomorrow I will be posting a recipe/guide for a twist on a growing favorite, watermelon slushies. 

Thanks for viewing! Please comment and let me know what variations you tried!